Fuzzing is a method to identify software bugs and vulnerabilities. The current development shows a trend to move fuzzing into the cloud, as cloud fuzzing offers a fuzzing speed increase and lots of extra flexibility compared to classic fuzzing. In this tutorial, we go through the full process of cloud (Amazon Cloud) fuzzing. This means deployment, fuzzing and retrieving the results using the softScheck Cloud Fuzzing Framework (sCFF). We identify a vulnerability present in tcpdump version 4.9 running on Ubuntu 16.04. We analyze the bug and write a patch which closes that vulnerability. Readers can download sCFF and follow the tutorial step by step.
Contents
1 Background knowledge
The first chapter covers some basics and programs used in the process. If you are already experienced with cloud fuzzing or simply don't care, you can skip this chapter and continue directly with chapter two. Otherwise, we strongly recommend reading the blog post from top to the bottom. The sub chapters are as brief as possible but contain links which provide further information.
1.1 Fuzzing
Fuzzing is a technique to test the robustness of software. A fuzzer is a program which feeds the target program with generated data. It then monitors the target program to check if given input leads to a crash a hang or other unexpected behavior. This process is repeated until the user decides to stop.
Lots of those anomalies are in fact vulnerabilities, which a sophisticated attacker could exploit. For security experts fuzzing is basic equipment because it’s automatable and can be used on every software, which in some way reads data, which is nearly every software that exists. The source code is not needed, although if available it can speed things up if the fuzzer implements techniques such as instrumented fuzzing or symbolic execution. For decades the fuzzer as well as the target application were running on a local computer. However, with the rise of companies offering infrastructure as a service, it seems only logical to run fuzzers in the cloud as well. In fact, big companies such as Microsoft and Google already fuzz in the cloud. With Project Springfield, Microsoft even goes a step further and offers its cloud fuzzing services to developers.
But why should one use cloud fuzzing over classical fuzzing? With cloud fuzzing, you don’t have to buy extra computers, which need to be delivered to you, cost a lot of money, take up precious space, need time to set up and so on. But the major advantage of cloud fuzzing is its flexibility. Almost everything can be exchanged within a very short time. A program can be fuzzed on different operating systems at the same time, to check if it might behave differently on them. If one project requires a high data throughput, an instance that utilizes many SSDs in a RAID0 configuration can be used. When an application requires lots of RAM, a corresponding instance can be selected. If a web application or a network protocol should be tested, hundreds of low end, and therefore cheap, machines can be created to get the job done.
Of course, there are also drawbacks. First, you have to trust the owner of the cloud, as everything runs on his, not your machine. Also, machines are paid on runtime basis. If you use a machine for several months you end up paying much more than you would if you had bought an equivalent PC.
1.2 Amazon AWS
The Amazon Web Services (AWS) is a collection of various online services of the company Amazon.com. AWS is currently the biggest player in Cloud Computing. One component of AWS is Elastic Compute Cloud (EC2). EC2 allows the user to set up virtual machines, which are fully configurable and act as servers. An instance is a virtual server in the cloud, consisting of an operating system, including the software installed on it, assigned resources, as well as various settings, which are selected during the creation. The operating system can be chosen from a huge pool of Amazon Machine Images (AMI). The instance on which this image is run can also be chosen from about 100 different machine configurations, which are all optimized for different tasks and range from very slow machines (1 CPU core/512MB RAM) up to super-fast 256 core and 2TB RAM machines. The user only pays for every hour the machines are running, where fast machines, of course, cost more than the slower ones.
1.3 softScheck Cloud Fuzzer Framework
To make the fuzzing process as easy as possible we at softScheck wrote sCFF the softScheck Cloud Fuzzer Framework. sCFF is written in Python 3 and uses the Boto 3 API to communicate with AWS. sCFF is divided into various subprograms to follow the Unix paradigm: One tool for one job.

For in-depth details of the sCFF architecture read the sCFF paper.
1.4 American fuzzy lop
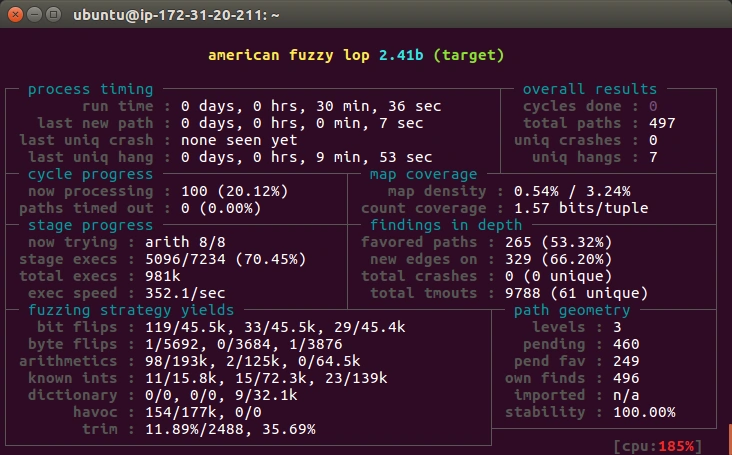
American fuzzy lop (afl) is the fuzzer used by sCFF. afl is known for its speed, reliability and retro UI and already found lots of bugs in other software. If the source code is available, it can instrument the code, which is used during fuzzing to generate better fuzz data, leading to a greater code coverage. The bigger the code coverage in a given time, the greater the chances of hitting a security vulnerability.

1.5 tcpdump
Tcpdump is a largely known network packet analyzer. It is able to capture, display and save packets running through the network in the pcap file format. Later those packets can be displayed as well. Tcpdump is, unlike its big brother Wireshark, a pure – non-interactive command line program, making it easy to fuzz.
1.6 GNU Debugger
With the GNU DeBugger (GDB) one is able to go to a program step by step and see what leads to a crash. If the analyzed binary is compiled with debugging symbols, you can see at which line in the source code the program currently is, making it easy to fix bugs. It is even possible to change the value of certain variables during runtime, which can be used to quickly see if a change in the variable value fixes the bug in the program.
2 Fuzzing tcpdump using sCFF
Now that we covered the basics, lets go ahead and find a tcpdump 4.9 vulnerability. The chapter is split into four parts. The first chapter lists, what has to be done before you continue with the tutorial. We didn't wanted to bloat this tutorial, so these topics are not covered within this blog post. However, there are plenty of tutorials out there how to do complete them. The second chapter covers the pre-fuzzing phase, which basically is about what to do before the real fuzzing (which is covered in the third chapter) can start. The last one is about what to do when you actually found bugs.
2.1 Preliminary work
If you want to find the tcpdump vulnerability the way we did, you have to complete some steps, which are not covered in this tutorial first. Basically, these steps boil down to setting up an AWS and sCFF. If you want to find the vulnerability using classic local fuzzing, or a just want to read the blog post, you can skip these steps.
-
Required
- Create an AWS Account
- Export AWS key id and secret key
- .aws/config should contain your region and .aws/credentials should contain your key id and secret access key
- Create SSH Security Group which allows traffic to flow between instances and from external to port 22
- Create and download key pair (this is later used for SSH connections)
- Download and install sCFF
-
Optional
- For instrumented fuzzing, AFL should be installed localy
- For exploitcheck afl-collect aswell as GDB + exploitable plugin should be installed.
2.2 Pre-Fuzzing-Phase
If preliminary work is done, the tcpdump version 4.9 source code must be downloaded. You can also download the latest git version if you want, however, the security vulnerability that is shown in this tutorial is fixed in newer versions, but there might be some vulnerabilities left to identify ;). Nevertheless, after downloading the source code, compile it using afl-gcc to benefit from afls instrumented fuzzing (CC=afl-gcc ./configure && make).
If the compiling was successfully you can run scff-mkconfig to create a sCFF project file. Be sure to set the target to tcpdump and the arguments to –e –r @@. –e and –r are tcpdump arguments, where –e stands for print extended header and –r for read file. The two at signs are later substituted by afl with the the fuzzed file, which is generated by afl every time. Keep in mind, if you are new to AWS t2 machines are free, as long as your runtime is lower than 750 hours. So you might want to stick to t2 machines for the fuzzing process. Also for *much* faster results, it is recommended to use a template. We used a small (170 bytes) pcap containing ipv4 traffic. As a reference, below is the the configuration file created by scff-mkconfig we, at softScheck
used:
[INSTANCES]
ami = ami-0963b466
gid = tcpdump49
instancetype = t2.micro
name = auto
numberofmachines = 4
platform = linux

[FUZZING]
dependencies = none
fuzzer = afl
fuzzdir = fuzzing
inputdir = fuzzing/input
outputdir = fuzzing/output
template = ipv4.pcap
target = tcpdump
args = -e -r @@
EC2 instances can now be created running scff-create-instances. You should be able to connect to them using SSH with your key pair.
2.3 Fuzzing-Phase
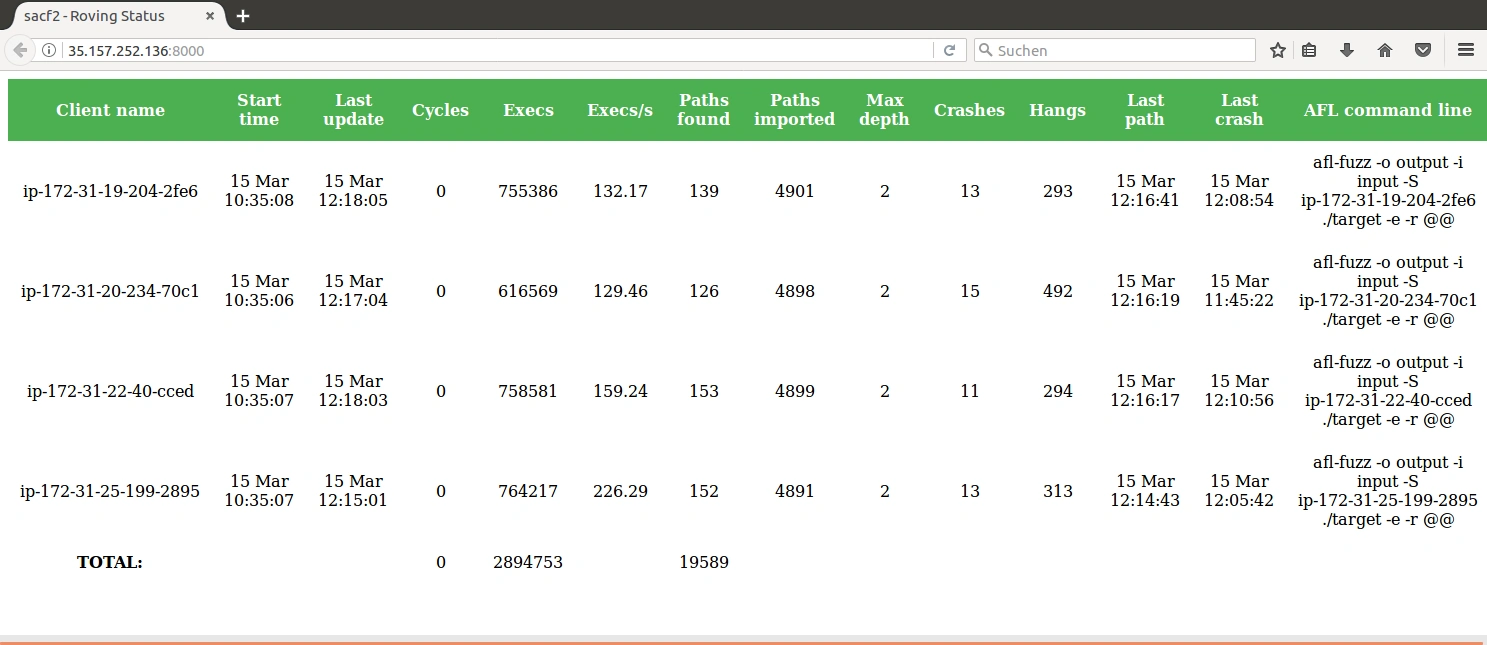
Next, you have to set up the newly created machine(s) for the fuzzing process. This is can be achieved with the command: scff-ctrl . bootstrap. Once bootstrapping is done the actual fuzzing can begin. sCFF allows you to choose between single mode fuzzing and distributed fuzzing. In single mode fuzzing each instance runs a fuzzer on its own. In distributed fuzzing also each instance runs a fuzzer, however, the fuzzing data is shared between the instances, leading to faster results. If you have more than two instances, distributed mode is recommended. Distributed mode can be started with scff-ctrl . distributed. To view the status of the fuzzing, point your web browser to the IP and port of the roving server.

After some time you should see the crash counter rise. The files leading to these crashes can be downloaded anytime by entering: scff-ctrl . grab-findings.
2.4 Post-Fuzzing-Phase
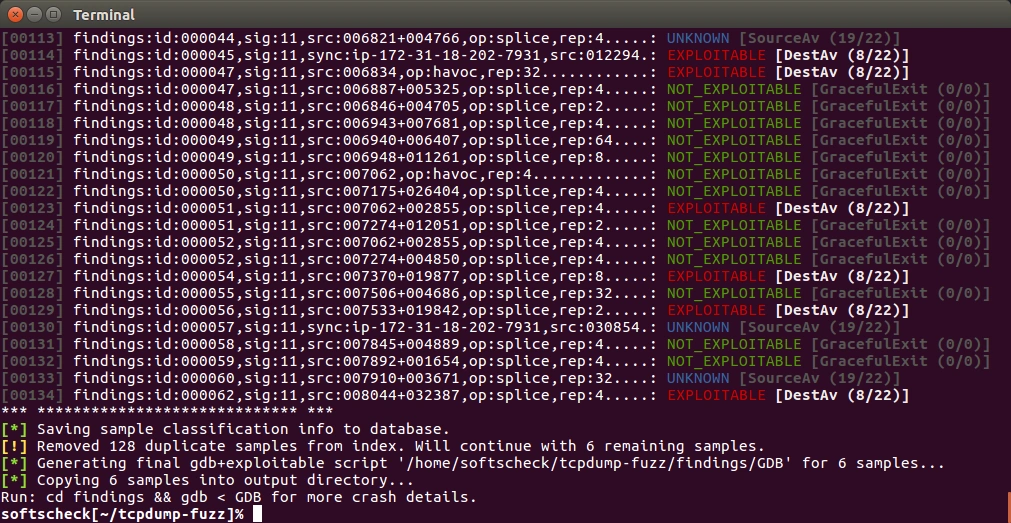
Running scff-exploitcheck will analyze these findings. False-Positives and duplicates will be filtered. The remaining findings will be checked against exploitability.

If you have a findings marked with a red EXPLOITABLE label, chances are high that you found a vulnerability. Check those findings with gdb. As you can see in the image below, tcpdump 4.9 has an exploitable vulnerability in the file print-sl.c.

With a bit of further debugging, we can see that dir is 255 but dir is also the index of lastlen, which is defined as lastlen[2][255]. So we are out of bounds, which lead to the crash.
To fix this error we either have to correct the value of dir or check if dir is between 0 and 2. set a breakpoint after dir = p[DIR_SLX] and then change the value of dir within gdb to a valid number (e.g. 0), via set p = 0. Now try to write a patch for the issue!
If you want to spoil yourself, click here for a solution.
	--- a/print-sl.c
	+++ b/print-sl.c
	@@ -131,8 +131,21 @@ sliplink_print(netdissect_options *ndo,
		u_int hlen;

		dir = p[SLX_DIR];
	-	ND_PRINT((ndo, dir == SLIPDIR_IN ? "I " : "O "));
	+	switch (dir) {

	+	case SLIPDIR_IN:
	+		ND_PRINT((ndo, "I "));
	+		break;
	+
	+	case SLIPDIR_OUT:
	+		ND_PRINT((ndo, "O "));
	+		break;
	+
	+	default:
	+		ND_PRINT((ndo, "Invalid direction %d ", dir));
	+		dir = -1;
	+		break;
	+	}
		if (ndo->ndo_nflag) {
			/* XXX just dump the header */
			register int i;
	@@ -155,13 +168,21 @@ sliplink_print(netdissect_options *ndo,
			* has restored the IP header copy to IPPROTO_TCP.
			*/
			lastconn = ((const struct ip *)&p[SLX_CHDR])->ip_p;
	+		ND_PRINT((ndo, "utcp %d: ", lastconn));
	+		if (dir == -1) {
	+			/* Direction is bogus, don't use it */
	+			return;
	+		}
			hlen = IP_HL(ip);
			hlen += TH_OFF((const struct tcphdr *)&((const int *)ip)[hlen]);
			lastlen[dir][lastconn] = length - (hlen << 2);
	-		ND_PRINT((ndo, "utcp %d: ", lastconn));
			break;

		default:
	+		if (dir == -1) {
	+			/* Direction is bogus, don't use it */
	+			return;
	+		}
			if (p[SLX_CHDR] & TYPE_COMPRESSED_TCP) {
				compressed_sl_print(ndo, &p[SLX_CHDR], ip,
					length, dir);
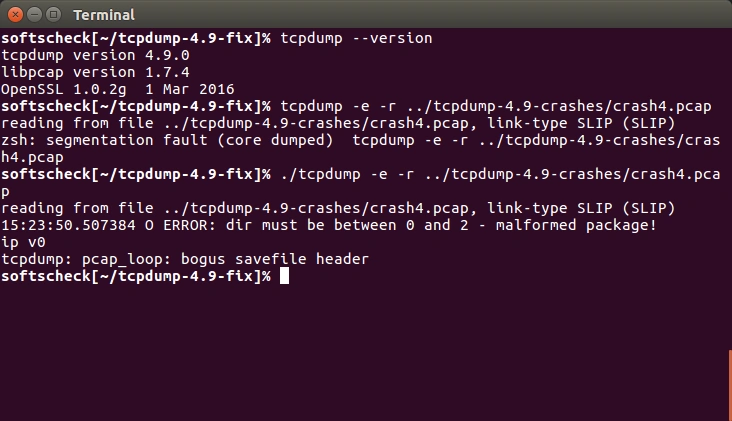
Now recompile and check if the program stil crashes.

3 Final thoughts
The security vulnerability isn’t a huge one because the attacker has to get the victim to open the pcap with the –e parameter. Even than the attacker somehow must get data on the address the out of bounds array jumps to, so that the program does not simply crash, but do malicious things.
When we told the tcpdump security team about the issue they responded fast and detailed. The potential vulnerability will be patched in the next tcpdump version (4.10).
But this post still shows how fast bugs and vulnerabilities can be found with cloud fuzzing and a good toolchain. It took as at softScheck about 5 hours to identify and fix the vulnerability. Here is a breakdown:
| Phase | Time [minutes] |
|---|---|
| Downloading and compiling tcpdump: | 10 |
| Pre Fuzzing Phase + template generation: | 10 |
| Fuzzing Phase: | 110 |
| Post Fuzzing Phase: | 60 |
| Patch writing and retesting: | 90 |
| Total: | 300 |
The total EC2 costs of this testing would be about 25 cents, if it weren’t in the first 750 free hours. For questions about this article or the softScheck Cloud Fuzzing Framework feel free to write a mail.
UPDATE (September 2017)
Version 4.9.2 released on 3rd September fixes this vulnerability. Github commit, closing the security vulnerability.
Read about other interesting topics on our blog.